
At Legacy Fence Company, we walk Austin homeowners through the fence installation process every week. The gap between deciding you want a fence and having a finished fence on your property involves several steps, and knowing what each one looks like helps you plan accurately and avoid surprises along the way.
Across our Austin TX service area, the timeline from first call to finished fence typically runs two to four weeks, depending on HOA involvement, permit requirements, and scheduling. The process breaks into five stages: the site estimate, HOA approval and permitting where applicable, pre-installation preparation, installation itself, and the post-installation walkthrough.
Here is what each stage looks like in practice.
Stage One: The Site Estimate
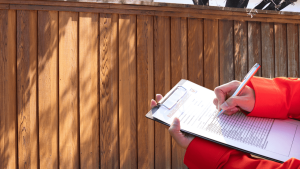
The process starts with a site visit. A fence estimator comes to your property, walks the planned fence line, and assesses the specific variables that affect your project: soil conditions, terrain slope, existing fence condition if there is one, proximity of utilities and tree roots, and any HOA fence line constraints. This assessment is what makes the estimate accurate. A phone quote given without a site visit is based on assumptions that may not match your actual property.
After the walkthrough, you receive a written, itemized estimate covering material type and grade, post depth, linear footage, labor, disposal of existing fence if applicable, and permit fees if required. Nothing is scheduled until you review and approve the estimate. Take time to read through it carefully and ask about any line item you do not recognize.
Scheduling the estimate is the right first step whether or not you are ready to commit. Many homeowners find that having a written estimate with a real price makes the rest of the decision considerably easier.
Stage Two: HOA Approval and Permits
If your property is in a community governed by a homeowners association, HOA approval must be obtained before installation begins. Most Austin HOAs require a formal application that includes the proposed fence dimensions, materials, style, and sometimes a plot plan showing fence placement. Review timelines vary by community. Some HOAs process applications on a rolling basis. Others review submissions at monthly meetings. A contractor with experience in your HOA can give you a realistic timeline and prepare an application that meets the community’s specific requirements.
Our guide on fence permits in Austin covers the city’s permit requirements in detail. For most standard residential fences under eight feet in height, a city permit is not required. However, certain flood zone designations and specific overlay areas may trigger permit requirements. We review this for every project during the estimate process.
For properties near waterways like Barton Creek or Onion Creek, setback requirements from the waterway may constrain where the fence can be placed. These requirements are checked during the estimate walkthrough so they are factored into the project design from the start.
Stage Three: Pre-Installation Preparation
Once the estimate is approved and any HOA or permit clearances are in place, a crew is scheduled. Before installation day, the contractor calls 811 to request an underground utility locate for your property. This is a required step that protects both the crew and your utility lines. The locate typically takes two business days and the results are flagged on your property.
Our guide on how to prepare your yard for fence installation covers everything to do before installation day. The short version: clear the fence line of items that could obstruct the crew, and flag anything underground on your property that may not be in utility records, such as buried irrigation lines or drainage pipes.
You do not need to be present during installation if the fence line is accessible and no permit or HOA requirement calls for homeowner presence. Being present at the start of the first day to review the post layout with the crew before concrete is poured is recommended. This is the best time to catch any last-minute adjustments before they become permanent.
Stage Four: Installation Day and the Post-Installation Walkthrough
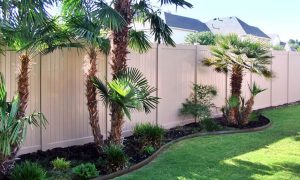
Installation day begins with post setting. Posts are placed at the planned locations, set to the specified depth, and anchored in concrete. In Austin’s clay soil, proper post depth is critical to long-term stability. Concrete cures overnight, and rails and boards go on after the cure is complete. Gate installation and hardware go on last.
For most residential fence installation projects in Austin, installation takes one to two days depending on the total fence length and material. Cedar board-on-board and vinyl panel installations on standard residential lots are typically completed in a single day. Longer fence lines, composite installations, and projects involving significant grade transitions may take two days.
After installation is complete, a crew member walks the finished fence with you and addresses anything that needs adjustment before leaving. Our workmanship warranty covers the installation for one year. If anything develops within that window, a crew comes back to fix it.
The best way to understand what your specific project will involve is to start with an on-site assessment. Request a free fence estimate and a local crew will walk your property, evaluate the fence line, and provide a written quote that accounts for all the variables specific to your yard.